Meta Description (SEO-Optimized):
Discover how to make the best vegetable tortilla roll ups — healthy, colorful, and bursting with fresh flavors. Perfect for parties, picnics, or quick lunches!
🥕 Introduction
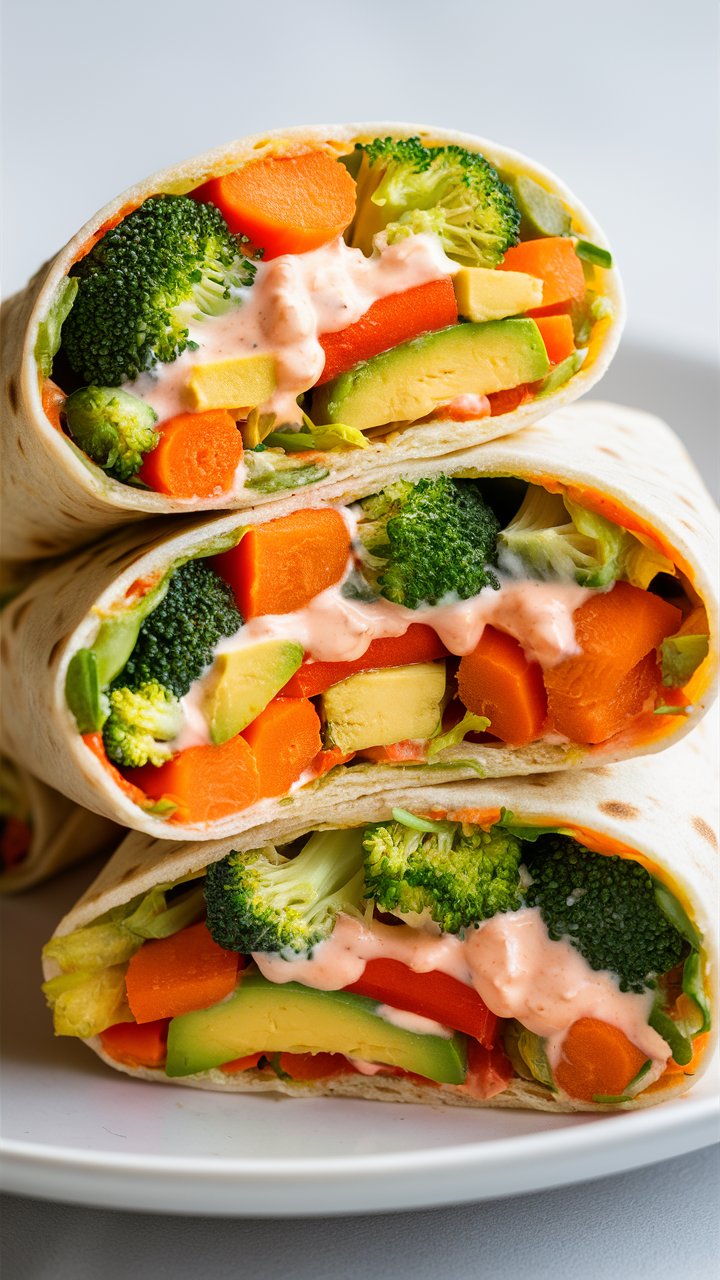
Looking for a snack that’s healthy, quick, and irresistibly delicious? These Vegetable Tortilla Roll Ups check every box. Soft tortillas wrapped around a creamy, savory filling packed with fresh vegetables — it’s the perfect blend of texture and taste.
Whether you’re preparing a party appetizer, lunchbox meal, or a grab-and-go snack, these veggie roll ups are your ultimate choice. Plus, they’re fully customizable: make them vegan, gluten-free, or protein-rich with simple swaps.
❤️ Why You’ll Love This Recipe
There’s a reason these roll ups are trending!
- ✅ No-cook recipe — perfect for busy days.
- ✅ Customizable — use any veggies or spreads you love.
- ✅ Nutritious & colorful — packed with fiber, vitamins, and antioxidants.
- ✅ Crowd-pleaser — ideal for parties, picnics, or school lunches.
- ✅ Kid-approved — mild, creamy, and fun to eat!

🥒 Ingredients You’ll Need
Here’s everything you need to make your tortilla roll ups absolutely delicious:
Base
- 4 large tortillas or wraps (whole wheat, spinach, or multigrain work best)
- 1 cup cream cheese or Greek yogurt spread (use vegan cream cheese for dairy-free)
Vegetables (Finely Chopped or Julienned)
- ½ cup bell peppers (red, yellow, green)
- ½ cup carrots
- ½ cup cucumbers (remove excess moisture)
- ½ cup purple cabbage
- ¼ cup green onions or chives
- 2 tbsp fresh herbs (parsley, cilantro, or basil)
Optional Add-Ons
- 2 tbsp hummus or pesto for extra flavor
- ¼ cup grated cheese (optional)
- Salt, black pepper, and chili flakes — to taste
👩🍳 Step-by-Step Instructions
Step 1: Prepare the Filling
In a medium bowl, mix your cream cheese (or yogurt) with salt, pepper, and any herbs or flavorings you like. Add chopped vegetables and mix until everything is evenly coated.
🧠 Pro Tip: For a bold flavor twist, divide your mixture into two portions and add hummus to one and pesto to the other.
Step 2: Spread and Roll
Lay your tortilla flat and spread a generous layer of the creamy vegetable mixture all the way to the edges.
Starting from one side, roll it tightly into a cylinder. The tighter the roll, the cleaner your slices will look.
Step 3: Chill
Wrap each roll in plastic wrap and refrigerate for at least 30 minutes. This helps firm up the filling and makes slicing easier.
Step 4: Slice and Serve
Remove the wrap and cut into 1-inch slices using a sharp knife. Arrange on a platter and serve chilled or at room temperature.
🍋 Optional Garnish: Serve with salsa, guacamole, or a tangy yogurt dip for an elevated flavor experience.
💡 Expert Tips for Perfect Roll Ups
- Keep it dry: Pat veggies dry with a paper towel to prevent sogginess.
- Use room-temperature spread: Cold cream cheese tears the tortilla.
- Tight rolls = clean slices: Wrap them snugly before chilling.
- Color balance: Mix vibrant veggies for visual appeal.
- Serving suggestion: Use toothpicks for neat serving during parties.
🧄 Flavor Variations and Customizations
🌯 Mediterranean Style
Use hummus, olives, feta, and cucumbers with a drizzle of olive oil.
🌶️ Mexican Style
Add mashed avocado, black beans, corn, jalapeños, and a dash of lime.
🥬 Indian-Style Veggie Roll Ups
Mix curd with mint chutney, shredded carrots, and cabbage for a tangy, spicy twist.
🧀 Kids’ Favorite Cheese Roll Ups
Add a thin layer of cheese slices or grated cheddar before rolling.
🧊 Storage, Meal Prep & Make-Ahead Tips
These tortilla roll ups are perfect for meal prep!
- Refrigerator: Store in an airtight container for up to 3 days.
- Meal prep hack: Prepare filling 1–2 days in advance and assemble fresh.
- Travel-friendly: Great for office lunches, road trips, or picnics.
🧺 Tip: Wrap each roll in foil or parchment to keep them fresh longer.
⚠️ Common Mistakes to Avoid
- ❌ Using wet vegetables — this makes tortillas soggy.
- ❌ Overfilling — leads to messy rolling and breaking.
- ❌ Cutting before chilling — always refrigerate before slicing.
- ❌ Using thick tortillas — thin, flexible ones roll best.
🥗 Nutrition & Health Benefits
Each serving (about 2 roll ups) provides:
- Calories: ~180
- Protein: 6g
- Fiber: 4g
- Vitamin C: 30% of daily value
- Calcium: 10% of daily value
Packed with fiber-rich veggies and whole grains, these roll ups support better digestion, heart health, and sustained energy. Swap in Greek yogurt for added protein or go vegan for a lighter option.

🍽️ Serving Suggestions
Serve these roll ups:
- As a healthy appetizer at parties.
- For kids’ lunchboxes with a fruit cup and smoothie.
- At picnics with fresh lemonade.
- As part of a light dinner platter with soup or salad.
They also look amazing arranged in spirals on a tray — perfect for Instagram-worthy food photos!
❓ FAQs
1. Can I make these the night before?
Yes! They hold up beautifully overnight if stored wrapped and chilled.
2. Which tortillas work best?
Whole wheat, spinach, or sun-dried tomato tortillas are perfect for flavor and flexibility.
3. Can I freeze them?
Freezing isn’t recommended, as the vegetables lose texture after thawing.
4. Are they vegan-friendly?
Yes — simply replace cream cheese with vegan spread or hummus.
5. How do I prevent soggy roll ups?
Dry your veggies, spread a thin base layer, and chill before cutting.
🌟 Final Thoughts
These Vegetable Tortilla Roll Ups are more than just a snack — they’re a vibrant, wholesome, and endlessly customizable power meal. With their bright colors, fresh crunch, and creamy filling, they strike the perfect balance between health and flavor.
Whether you’re feeding kids, meal prepping for the week, or impressing guests, this recipe is a guaranteed crowd-pleaser. Try it once, and you’ll add it to your weekly rotation!